For a list of articles in this series, go here: How To Set Up A Blog and Forum Article Index
Welcome to part seven of How To Set Up A Blog And Forum
Today we will be configuring plugins for WordPress. I think it’s best if we do some in this post and some in the next. Don’t worry, you won’t have to wait a week for the rest, I’ll do it in a day or so, I just don’t want to have another super long post. First, activate your WordPress plugins if you haven’t yet.
There is no particular order that these need to be done in. Most plugins are independent of each other and for those that do depend on another plugin, the required plugin usually just needs to be activated.
For our purposes, the order I’m configuring the plugins in happens to be the order my uploader chose to upload the screenshots. I already have the screenshots but I will be doing the actual configurations while I’m writing the post.
Yes that’s correct, you indeed are getting a live, play-by-play blog post. Aren’t you one lucky dog? ![]()
Something I need to point out is that for those plugins that show things to your visitors, you need to “Add” it to your blog. So you activate it, configure it, then add it. You add them by going under ‘Appearance’ and clicking on ‘Widgets’.

widgets
We’ll do that after we get things configured.
Most of the plugins that require configuration are found on the Dashboard screen on the left under ‘Settings’, a few are under ‘Tools’ or another category. I will try to remember to point out the few that are not, but no matter what, all you need to do is to click on the name and it will take you to the configuration screen.
For those of you who are already somewhat knowledgeable about plugins will notice that I often don’t do much configuring. There’s a lot of things where the defaults work just fine for me, they may or may not for you and I’m certain that much like my brain, I don’t use some plugins to their fullest capacity.
Feel free to customize the plugins any way you want, several of the plugins are pretty good about explaining their options and many of them have places where you can ask for help. You can always write to me and I will help you as much as I can.
So let’s get started with Yet Another Related Posts Plugin or YARPP, it’s called Related Posts (YARPP):
![]()
yarrp
YARPP simply takes your post, searches your other posts, and decides which ones are related and which ones aren’t. You can then display those so your visitors can do more reading on related topics.
This is one where I don’t change much, but when you bring up the screen under ‘”Relatedness” Options’ I do change Titles to: ‘Consider with extra weight’.
This does what it says, if the title of the post has some matches with other post titles, it will give extra consideration to those when deciding if they are related.
Again, cruise through the options and see what you would like to change. If you end up deciding that you don’t like what you picked you can either change the individual options or at the bottom of the screen you can click the reset button.
Once done, click on ‘Update Options’ and move on to the next one.
On to Tweet My Blog:
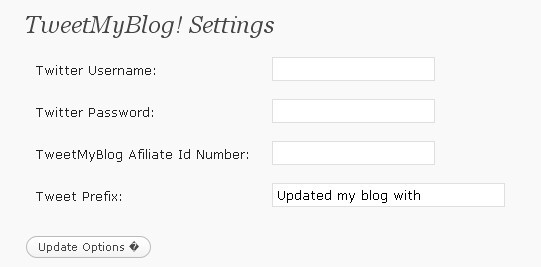
Tweet My Blog
Enter your Twitter username, password, an affiliate ID for Tweetmyblog if you have one and whenever you post a new blog, it will send a tweet on Twitter for you. The Tweet Prefix means that every tweet it sends out will start with ‘Updated my blog with’ so change it to whatever wording you want.
Now on to Subscribe To Comments:
![]()
Subscribe To Comments
This doesn’t really have a configuration, you just activate it and it will allow your visitors to be notified when someone adds a new comment to a post they are interested in.
On to Simple Twitterbox:

Simple Twitterbox 2
Simple Twitter box allows you to put your last few tweets onto the side of your blog. Neat, huh?
Now on to my nemesis: All in one SEO Pack:
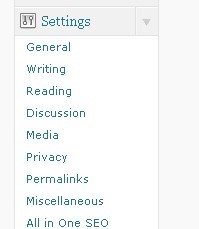
All In One SEO 1
Okay, maybe it’s not my nemesis, but when I first got started blogging I used it incorrectly and I felt stupid when I found out. I was told that all you had to do was add it to your blog.
Well, you still have to use it properly. You actually use it in two different spots, you configure it under settings, then you use it with each post. Personally I think it can be more automated, but since I don’t know how to write plugins….
In any case, it helps you optimize your blog, pages, and individual posts for the search engines.
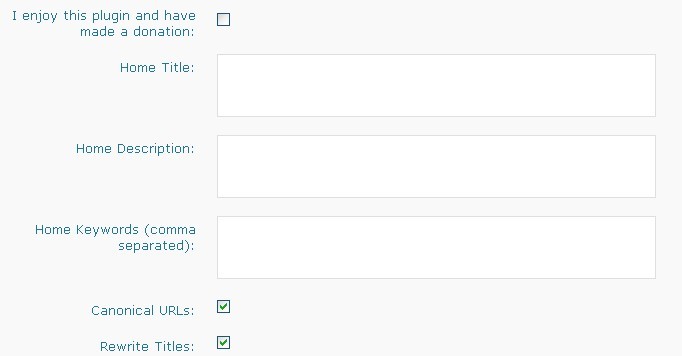
All In One SEO 2
When it’s talking about ‘Home’ it means ‘Your blog’. Enter the appropriate title, description, and keywords (each keyword or keyword phrase is supposed to be separated by a comma).
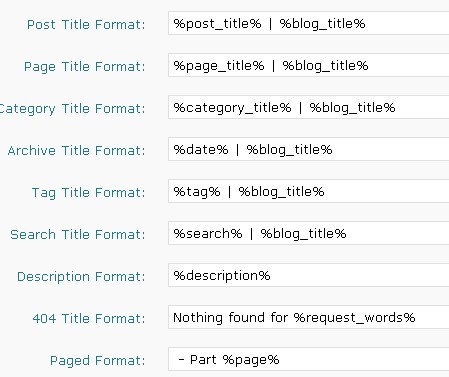
All In One SEO 3
That part up above allows you to change how it optimizes your blog. If you don’t know what you are doing…leave it alone.
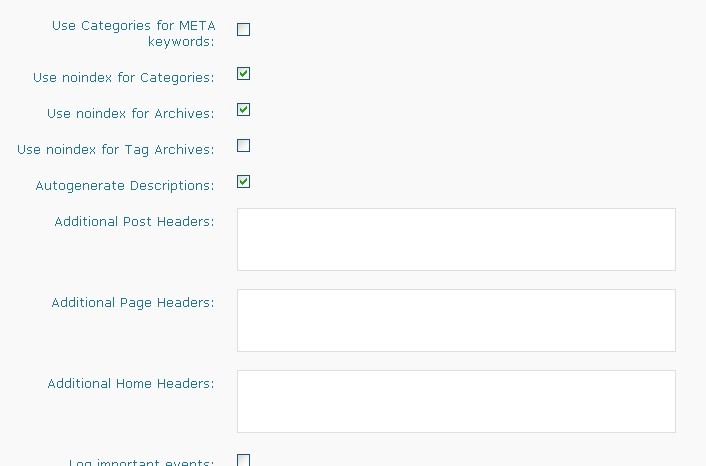
All In One SEO 4
I’d follow that piece of advice for what you see in the picture above as well. Categories for meta keywords allows you to use your blog’s categories to be added to the meta keyword tag.
I think it’s an “all or none” so if you have some categories you don’t want the search engines to look for, leave it unchecked.

All In One SEO 5
If you want a record of important events, check the ‘Log Important Events’ box and click on ‘Update Options’
On to RSS Footer Options:

RSS Footer
It allows you to put things into your RSS Footer. I leave it alone completely.
Now for your Privacy Policy:
![]()
Privacy Policy
This plugin creates a page with a generic privacy policy. Fill out anything missing and just scroll down and click on ‘create page’ and you’re done. The neat/weird thing is that when editing, you don’t see the privacy policy, you see the page, but not the policy, but your visitors will see the policy when they click on the page.
That took me a bit to figure out.
Now on to Paged Comments:
![]()
Paged Comments
Paged Comments breaks the comments you receive into pages for easier viewing. There’s nothing to configure.
Now on to KeywordLuv:
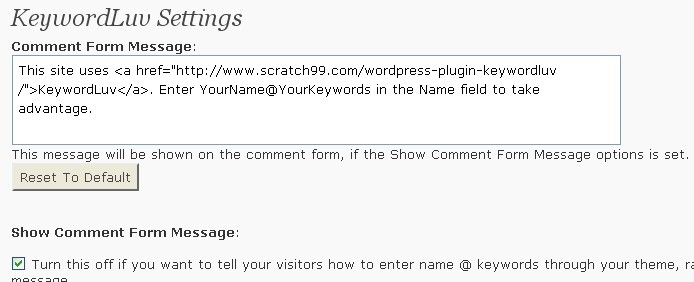
Keywordluv
KeywordLuv allows people to make their comments more keyword friendly, thus giving them a little extra help in the search engine department. First I will tell you that it requires the ‘Do Follow’ plugin, or a similar plugin.
Instead of having the person’s name be clickable, it makes it a keyword phrase. So I would put ‘Jeffery @ Blog Like A Celebrity’ instead of ‘Jeffery’ in the name field. What that does is instead of giving ‘Jeffery’ that’s clickable, it would list ‘Jeffery from Blog Like a Celebrity’ where ‘Blog Like a Celebrity’ is clickable.
Now on to Gravitar Subscribe:
![]()
Gravitar Subscribe
This allows people to sign up to the Gravitar service and have a custom Gravitar on your blog.
Now on to Google Sitemap:

Google Sitemap 1
Listed as XML-Sitemap, it will update itself when you update your blog posts. What it does is create a Google-friendly xml sitemap for your blog.
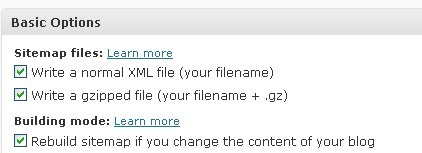
Google Sitemap 2
The options are pretty straight forward and I leave them alone except for this one:
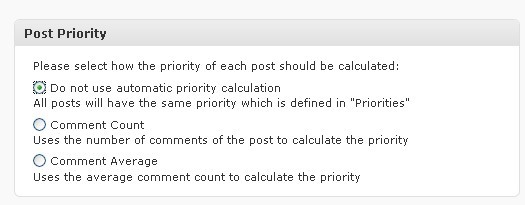
Google Sitemap 3
I use the ‘Don’t use automatic priority calculation’ I don’t want my post’s priority based on the number of comments it gets. You can if you want to.
Now on to Google Analytics:

Google Analytics 1
Go to Google and create an account, then create an Analytics account for your blog. Take the id code and insert it. This allows you to keep tabs on the different stats for your blog.
You can also display the stats to your visitors through the ‘Widgets’ if you like.

Google Analytics 2
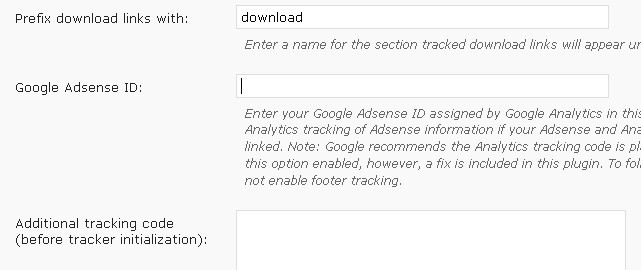
Enter your Google username and password and…
Google Analytics 3
your Adsense ID if you have one. Set up your other options, few though they may be and save.
On to DualFeeds:
Dual Feeds
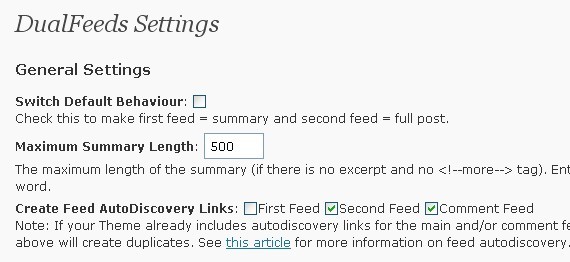
I must confess, this is one of those ones I always intend to get around to using but never quite make it. It allows users to choose between full text or summaries in their RSS subscription.
It supports Feedburner which if you don’t know, and I am simplifying this, standardizes the RSS feed. Fill in your options and go.
On to Do Follow:
![]()
Do Follow
By default, WordPress is Don’t Follow, this makes it a Do Follow. KeywordLuv requires it, or another plugin that does the same thing.
That’s it for this post. Next time we will finish configuring the plugins and install whatever widgets we want. If that doesn’t mean anything to you then don’t worry, it soon will.
– Jeffery
